
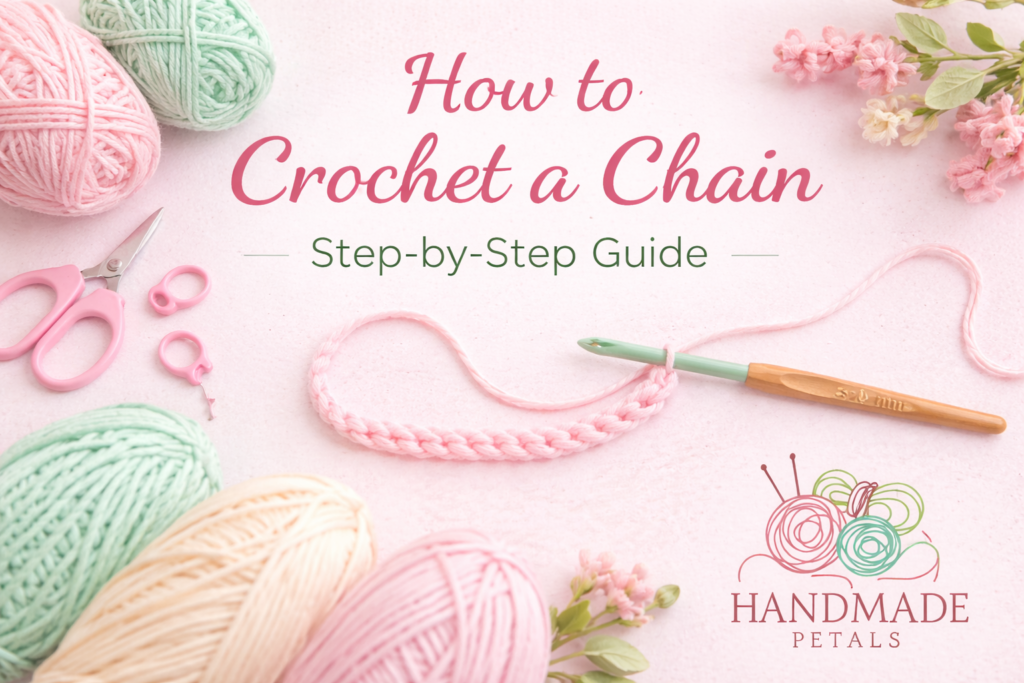
Introduction
Crochet always starts off with one very basic movement: the chain stitch. It is very easy on the surface, but this step is key for your project as a whole to go on and flourish. A well-made chain provides even basic stitches for later use. Starting a crochet chain isn’t only figuring out how to spin a loop; it’s about mastering yarn, tension, and rhythm.
There is an elaborate crochet chain tutorial and a whole series of practical techniques to make clean, even crochet stitches the first time you work on a stitch. A crochet chain is a succession of loops joined together, forming the starting point. Through each single loop, a crochet hook is drawn into and out of each loop with a continuous stitch.
A close look at a completed chain reveals that the pattern holds. The front faces show small “V” shapes, while on the back there are bumps. Every stitch is joined but distinct. This structure becomes vital as you begin to work through the chain in subsequent steps.
In most crochet patterns, the chain stitch is abbreviated as “ch.” For example, “ch 25” means you need to make 25 chain stitches in advance.
Tools and Materials You Need
Before you start your first chain, it is important to choose materials that make learning easier. The correct tools enable you to see stitches clearly and stay in control.
Yarn Selection
Selecting the right yarn can greatly improve your learning experience. Begin with yarn that has:
- Medium thickness (worsted weight)
- Smooth texture (not fuzzy or fluffy)
- Light color (so stitches are visible)
Avoid dark or highly textured yarn at the start, as it makes it difficult to identify individual stitches.
Crochet Hook
The crochet hook is the main tool for making stitches. Beginners should select a hook that feels comfortable and easy to control.
A good starting range is:
- Hook size between 4 mm and 6 mm
- Slightly larger hooks for easier movement
- Smooth materials such as aluminum or plastic
Additional Items
These are not required for chaining but can support your work:
- Scissors for cutting yarn
- Stitch markers for tracking stitches
- Measuring tape for checking length
Step 1: Making a Slip Knot
Before you start a chain, you need a starting loop called a slip knot. This knot anchors your yarn to the hook.
To create a slip knot:
- Form a loop with your yarn
- Pull a section of yarn through the loop
- Place the loop onto your crochet hook
- Gently tighten it
The knot should feel secure but still slide comfortably on the hook. If it is too tight, it will restrict movement when you begin chaining.

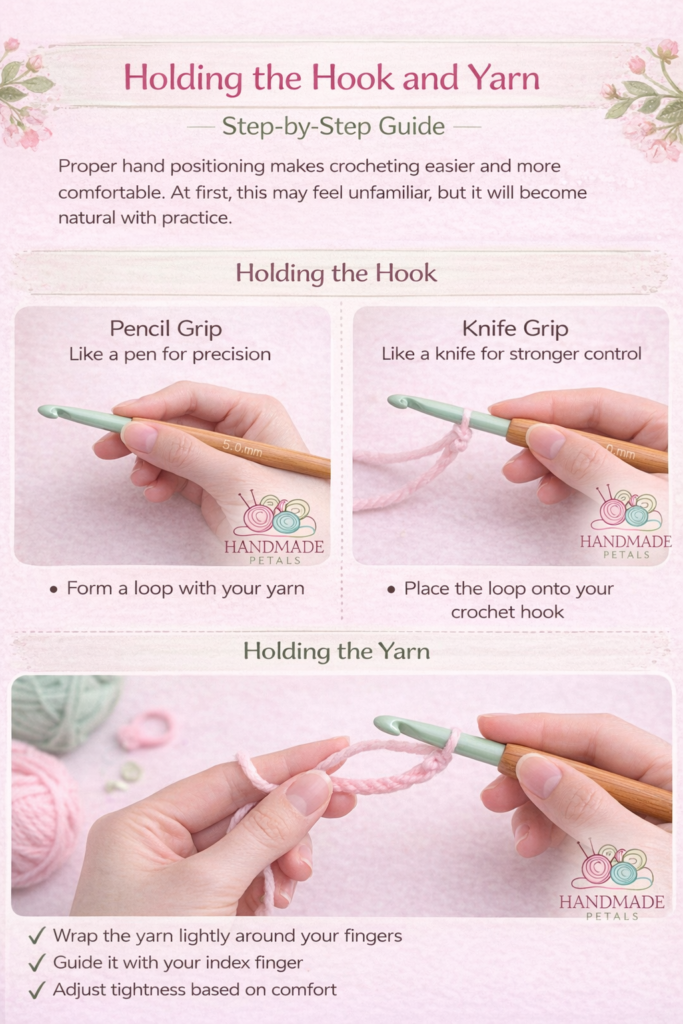
Step 2: Holding the Hook and Yarn
Proper hand positioning makes crocheting easier and more comfortable. At first, this may feel unfamiliar, but it becomes natural with practice.
Holding the Hook
There are two common ways to hold a crochet hook:
- Pencil grip: like holding a pen for precision
- Knife grip: like holding a knife for stronger control
Both methods are equally effective, so choose whichever feels more comfortable.
Holding the Yarn
Your non-dominant hand controls the yarn. Its role is to maintain tension while allowing smooth movement.
A simple way to hold yarn:
- Wrap yarn lightly around your fingers
- Guide it with your index finger
- Adjust tightness based on comfort
The goal is to keep the yarn flowing without pulling it too tightly.
Step 3: Crochet Chain for Beginners
Once your slip knot is ready and your hands are positioned correctly, you can begin creating chain stitches. The basic movement has two parts:
- Yarn over (wrapping yarn around the hook)
- Pull through (drawing the yarn through the loop on the hook)
Step-by-Step Process
- Keep the slip knot on the hook
- Wrap the yarn over the hook from back to front
- Pull the yarn through the loop on the hook
You have now completed your first chain stitch.
To continue:
- Repeat the yarn over
- Pull through again
Each repetition creates one additional chain stitch.
Understanding the Flow of Movement
In the beginning, you might feel that you are performing each step separately. Over time, these movements merge into one smooth motion. Instead of focusing on individual steps, it helps to build a rhythm.
- Wrap, then pull through, then repeat
- Keep your hands relaxed
- Maintain steady movement
Developing this rhythm is essential for improving speed and consistency.
What a Chain Should Look Like
A good crochet chain should look clean, balanced, and flexible rather than stiff.
Key characteristics include:
- Even stitch size throughout
- Clearly visible “V” shapes
- Smooth flexibility without curling
An uneven chain usually means your tension is inconsistent. This is common in the early stages and improves quickly with practice.
Controlling Yarn Tension
Tension refers to how tightly or loosely you hold the yarn while crocheting. It directly affects the appearance and usability of your chain.
Signs of Tight Tension
- Stitches are difficult to move
- Chain feels stiff
- Hook struggles to pass through loops
Signs of Loose Tension
- Stitches look stretched
- Chain appears uneven
- Structure lacks firmness
How to Improve Tension
- Hold the hook and yarn lightly
- Avoid pulling yarn forcefully
- Maintain a steady, controlled flow
Consistency matters more than perfection. Even if your tension is slightly tight or loose, keeping it consistent will improve your results.
Counting Chain Stitches
Counting stitches correctly is important when following patterns. Incorrect counting can lead to uneven edges and wrong project sizes.
How to Count Correctly
- Look for the “V” shapes in your chain
- Count each “V” as one stitch
- Ignore the loop on your hook
Tips for Accuracy
- Count every 5 to 10 stitches while working
- Double-check before finishing
- Use stitch markers if needed
This habit helps eliminate errors early.
Common Mistakes and How to Fix Them
Beginners often face similar issues when learning how to start a crochet chain. Recognizing them early helps you improve faster.
Tight Chain
Cause: pulling yarn too tightly
Fix:
- Use a larger hook
- Relax your hand movement
Loose Chain
Cause: lack of tension control
Fix:
- Adjust how you hold yarn
- Slow down your movements
Uneven Stitches
Cause: inconsistent hand motion
Fix:
- Repeat the same movement consistently
- Practice shorter chains
Twisted Chain
Cause: rotating the chain unintentionally
Fix:
- Keep the chain facing the same direction
Practice Techniques
Practice is essential for building confidence and control. A simple exercise can help improve quickly.
- Chain 20 stitches
- Observe stitch size and spacing
- Undo the chain
- Repeat multiple times
Repeating this process helps develop muscle memory.
Understanding Chain Length
Different projects require different chain lengths, and accuracy is important.
Examples include:
- Small samples: 10–20 stitches
- Scarves: 100+ stitches
- Blankets: depends on width
Always follow pattern instructions carefully.
Turning Chains Explained
When working rows, turning chains are used to bring your yarn to the correct height for the next row.
Examples:
- Single crochet: chain 1
- Double crochet: chain 3
Turning chains often count as the first stitch of the next row.
Fixing Mistakes Easily
One of the advantages of crochet is that mistakes are easy to fix. If something goes wrong, you can undo your work without wasting yarn.
To undo a chain:
- Pull the yarn gently
- Watch the stitches come undone one by one
You can then restart easily.
Improving Consistency Over Time
Consistency develops naturally with practice. Instead of aiming for perfection, focus on control and repetition.
Key habits include:
- Keeping stitches similar in size
- Maintaining a steady rhythm
- Practicing regularly
Over time, your stitches will become more uniform and easier to manage.
Transitioning to Real Projects
Once you are comfortable with chaining, you can start working on actual crochet projects.
Common beginner projects include:
- Scarves
- Dishcloths
- Simple blankets
All of these begin with a chain foundation.
Why the Crochet Chain Matters
The chain is not just a starting step—it affects the entire project. It determines the width of your work, the ease of stitching future rows, and the overall appearance. A strong foundation leads to better results.
Tips for Faster Progress
To improve efficiently, focus on consistent practice and technique.
- Practice daily, even for short periods
- Use the same yarn and hook initially
- Focus on technique rather than speed
- Observe your stitches carefully
Small improvements can lead to noticeable progress quickly.
Troubleshooting Checklist
If your chain does not look right, check the basics carefully.
- Is your yarn too tight or too loose?
- Are you using the correct hook size?
- Are you holding the yarn comfortably?
- Are your stitches evenly spaced?
Fixing these issues usually resolves most problems.
Final Summary
Learning how to start a crochet chain is the first step in crochet, but it is also one of the most important. A clean and even chain makes all future stitches easier and improves the overall quality of your work.
This crochet chain tutorial has covered everything you need, including tools and materials, the step-by-step process, tension control, counting stitches, common mistakes, and practice methods.
With consistent effort, your chain will become smooth, uniform, and easy to work with. Once that happens, you can confidently move on to more advanced crochet techniques.